April 07, 2014
By Frank Sargeant
A dirty job, but somebody has to do it.

The only thing worse than doing a boat trailer bearing replacement is not doing a bearing replacement and then getting caught out along the interstate with a broken-down rig. Hunting for a set of bearings at 5 a.m. is a fruitless enterprise, I can report from sad experience.
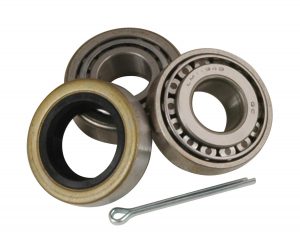
If you use your trailer regularly in saltwater, it's wise to inspect and repack the bearings annually, and since it's a dirty job to repack and bearings are relatively cheap, it's not a bad idea to go ahead and replace bearings and races while you have the wheel off. A set of two bearings, cones and a grease seal is around $16 for 1-inch axles.

A viable alternative is to carry a spare hub and bearing assembly, run your rig until the bearing starts making noise, heating up or leaking grease, and then replace the whole works; the work time is shorter because pulling the whole hub is a lot easier than taking out the bearings, races and seals and installing new. A kit is around $35 for 1-inch axles, up to $65 for larger axles—very cheap considering the enormous headaches not having a spare can bring. You can get complete kits in a carrying case from www.westmarine.com and other sources.
Which ever way you go, remember one size does not fit all, though the standard for small boats is the 1” x 1” axle. Some axles are tapered and will have a designation of 1 1/16” x 1 3/8” for example—check with the trailer manufacturer. (On hubs, you have to have the right wheel-nut bolt pattern and diameter, too.)
Here's the basic drill, either way: If you're not replacing the hubs, you do not have to remove the lug nuts to separate wheel and hub—just pull the whole assembly, as follows.
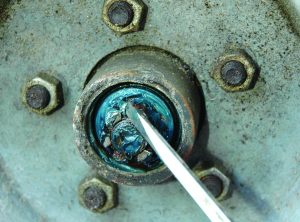
 Cotter pin and castle nut on hub.
1. Secure the opposite wheel so that it can't roll by putting blocks in front of and behind the tire.
2. Pry off the dust cover or Bearing Buddy over the axle.
3. Remove the cotter pin in the slotted castle nut on the axle with needle-nose pliers.
4. Remove the castle nut. You may need large vise grips to get it started. Place all parts in a plastic bag or on a sheet of newspaper, anywhere that sand won't get on them.
5. Now wiggle the hub slightly and slide it off. The outer bearing will fall out.
6. Tap out the old grease seal, inner bearing and inner and outer races from inside the hub. A punch inserted inside the hub and tapped with a hammer does a good job on races you are replacing.
7. Clean everything in sight—the axle, inside of the hub, etc. with multiple paper towels. Make sure there's no grit left anywhere inside the hub or on the axle.
8. Pack the new bearings with grease and lube the spindles.
9. Tap the new bearing races into place in the hub. The old bearing races are a good hammering surface to fit the new ones into place. Push the greased inner bearing into place, then insert the grease cup, cover it with a block of wood to protect it, and tap it home.
10. Slide the wheel/hub assembly into place on the axle. Then insert the outer bearing, pushing it firmly against the race.
11. Reinstall the axle washer and castle nut. Tighten until it just stops, then back off a quarter turn.
12. Insert the cotter pin through the hole in the axle to prevent the nut from turning. Make double sure you don't omit this step or you will lose the wheel on your first trip out of the driveway.
13. Reinstall the lube fitting and fill it with grease, then clean up. You're done.
14. Keep your hubs lubed and check them often for overheating as you travel—you'll avoid the roadside repair everyone dreads.
FS

